
This week I am talking about henna hair dye for natural, shiny and beautiful locks. So a couple of weeks ago I was away in Morocco and decided to have my hair dyed professionally with henna. Not many hairdressers use it these days so I was delighted to have the opportunity to get it done in Morocco where it is still used regularly. I had hoped to find somewhere that did it, since I noticed there were lots of henna tattoo places around.
Luckily, there was a spa around the corner from where we were staying that had a hairdressers. I asked them and they were happy to use henna hair dye instead of the standard chemical kind. Although not that commonly used as a hair dye, they often obliged when people asked. They informed me the process would take a little longer than usual due to the extra time it takes to prepare and apply. They asked me if I had ever used henna before and I assured them I had.
I have used henna many times before at home and been really impressed with the results. Henna natural hair dye makes my hair shiny and beautiful so that is why I love it. The chemical laden hair dyes that you find in supermarkets and in hairdressers tend to strip my hair and make it frizzy and dry for weeks.

I also have a strong opinion about the harsh chemicals, including Formaldehyde found in the standard hair dyes with ammonia. There are various chemicals linked to cancer and also hormone disruptors to be found in hair dyes so I rather steer away from anything like that.
I also have curly hair which reacts badly to the chemicals in hair dye that strip the hair of its natural oils. I am currently following a natural hair care regime which involves as little manmade chemicals as possible, so that I can maintain healthy and shiny hair and lock in moisture. This is another reason for using a natural henna hair dye. I have no worries about damaging my hair and I can easily get a rich and beautiful colour without resorting to chemicals.
Righto, so here is the lowdown on henna. Henna has been around for thousands of years and women have been using it since ancient times. It is naturally grown in the Middle East and is mainly sold in powder form. It can be 100% natural henna (green in colour) or mixed with other natural dyes to produce darker shades.
Henna is naturally a vibrant red colour, however your original hair colour will depend on the end colour. For instance, if you have blonde hair it will be a reddish orange/copper colour, brown will be a reddish brown and dark brown will be a darker red tone.
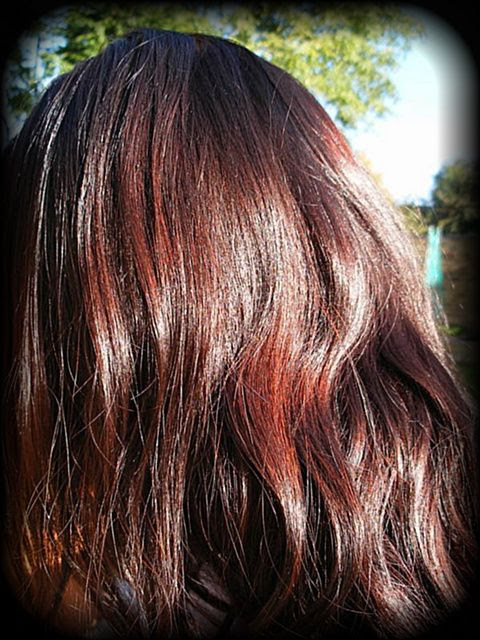
Henna will never lighten your hair colour, only darken it. The results vary greatly but don’t be put off by that. I was apprehensive before the first use but it turned out quite subtle, the colour change. I decided on a mahogany colour to be on the safe side. However, they used the 100% natural henna on my hair in Morocco and it was also quite subtle but less dark than the mahogany. Today I am using the mahogany as I want to darken it again and I wanted to do a demonstration for you guys.
It is quite messy so be prepared! It is however, simple to prep and works out quite inexpensive in comparison to other dyes. It is better for the environment and better for your overall health so don’t let the messiness put you off! Henna is unlike chemical dye in that it saves the hair shaft and cortex (inner layer) by varnishing the colour over the hair cuticles naturally. This helps the hair stay hydrated, retain shine and stay healthy. A much kinder process than standard hair dye.

Avoid henna if you dislike red tones in your hair. Also avoid if you plan on using a chemical hair dye in the near future as it is not recommended on top of the henna. It can result in uneven colour. It is best to avoid any other chemical processes such as chemical hair straightening or perms for the same reason.
Henna can last from 4-6 weeks and although it is permanent, you can re-do your henna dye as often as you like to find your ideal colour. I really like the mahogany so I will stick with that colour in future. Everyone comments on how shiny and vibrant my hair looks in the first week or so after dying my hair with henna. I love the softness and manageability it gives me.
Henna can be used on grey hair and produces similar results as blonde hair, a red/copper tone. It also covers greys but you need to start with the grey area first, leave it on for a while, then follow with the rest. I only have a few greys at the top which tend to dye a little lighter in colour but are unnoticeable. They just look like a different tone so it’s not a problem. I guess if you are growing out a chemical dye and have a line of grey across the hairline/parting it is probably advisable to dye the rest prior to applying henna as that would be uneven looking.

You can use henna over a chemical dye once it has been done at least a few weeks prior. If you have grey hairs and your greys are still noticeable after the first application, you can always just re-do those small areas without having to re-dye all your hair. You could use your fingers (with gloves) or else a dye brush like they have in the hairdressers.
Henna cares for your hair by giving it shine, volume and manageability. You should always do a strand test by dying one length of hair near you ear and put a little henna mixed with water on the back of your ear at the pulse point. This is to make sure you are not allergic, as you would with any hair dye. Better safe than sorry, you never know!
Don’t dye your hair with henna the same day or day after shampooing. Wait until the 3rd day for best results as the hair will be more porous.
Here is how you prepare the henna –
- Boil some water and have a medium/large metal bowl ready. Remember that henna is a dye so be careful not to use any plastic or porous bowls if you don’t want them dyed!
- Pour the henna powder into the bowl. I have medium length hair and used 45g, half a pack of 90g henna.
- Slowly and gradually add in some boiled water, stirring with a fork to blend. Keep stirring and adding water until a homogenous paste is formed.
- Leave that to cool for a few minutes and apply some disposable/waterproof gloves.
- Put on an old sweatshirt/teeshirt you won’t mind getting dye on in case.
- Grab a black plastic bag an make holes for your head and arms (optional).
- Bring the bowl of henna to the sink and put an old towel down on the floor for any stray bits of henna (there will be bits).
- Put on the black bag if you have one. Start applying the henna to areas of grey hairs and the hair line.
- Apply the henna in sections to cover all the hair and pay attention to the roots and ends.
- Make sure the henna is coating all of the hair as best as possible and pile it on top of your head. You can use an old shower cap if you want.
- Clean up any bits of leftover henna and make sure to remove any from you skin with soap and water.
- Leave on for an hour or follow the directions as stated on the pack.
- Wash out using a gentle, natural shampoo. You may need to do 2 lots of shampoo as it can be difficult to remove.
- Use an old towel to dry your hair after. There will no doubt be some residue leftover.
- Style as usual!


Voila! I think it is worth the mess and once you get used to doing it, it is so simple! It saves me a fortune and I love the results. There is really no need to have it done professionally at all. I got the same results at home and you don’t have to be perfect about it. I recommend it if you like a reddish auburn colour for dark hair and I have seen some gorgeous pics of copper tones on blondes online so if you’re looking for a lovely new hair colour then go for it!
Now I’m off to wash this out so I will catch up with you next week. Let me know your thoughts on henna and if you have any questions I am more than happy to answer them. Just pop your question in the comments and I will get back to you asap!
Bisous!
Ciara xxx


2 Comments
I’ve thought about trying Henna, since it’s all natural, so this is really helpful! Thank you! Your hair color is lovely!
Hi Amy, thanks I love it, it is messy but so worth it!